Tip 1044
Every good drawing deserves a great title block.
The title block makes a drawing appear official and important, at a single glance. It identifies the drawing as an expression of your (or your company’s or organization’s) brand. In doing so, it helps to build that brand.
The title block gives the reader of the drawing critical information about the document, including the project name, author, date of issue, topic, its place within a drawing series, etc.
It gives all of the project’s documents a consistent, professional look.
It also gives all of your organization’s documents a consistent, professional look.
It glorifies the client and gives them a feeling of importance. I learned long ago that this does matter. Maybe your clients have no ego at all, if so just disregard that last bit. 😉
Hint: Never make your name bigger than your client’s name on the title block.
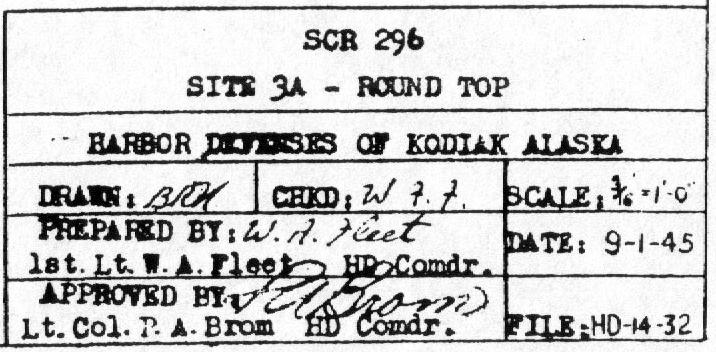
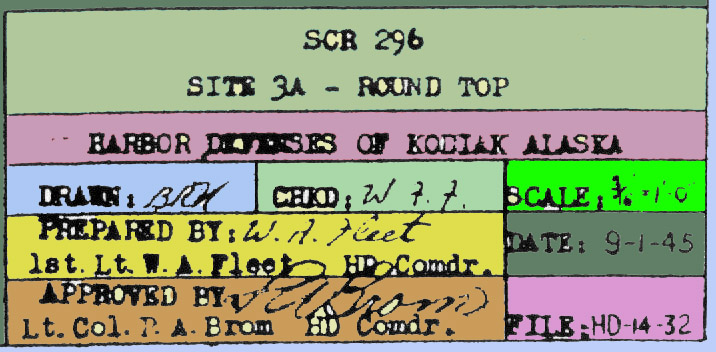
A title block from 1945
So, what goes into a great title block? In researching for this post, I ran across some old tutorials from the days of pencils, pens, erasers, and blueprints. I was amazed that there were so many rules and guidelines to follow in creating a title block, especially for a government project. I thought, no one is teaching– or learning– this stuff today. Usually we just find a convenient title block example that someone else created and do a quick modification.
Title blocks are important. They deserve some serious care, thought and time.
In some ways, the title block is more important than the drawing’s content!
So how does one make a great title block?
Titleblock example with notes
It’s hard to generalize about title blocks, because the drawing documents are so different for different industries. A drawing for building a memory chip will have very different requirements than a drawing for building a cruise ship. Still, let’s try to identify some guidelines. This post will focus on a few basics only. I’ll go into more depth in a future post.
DEFINITION
I tried to find a good, all-purpose definition for the term “title block” without success, so here is mine:
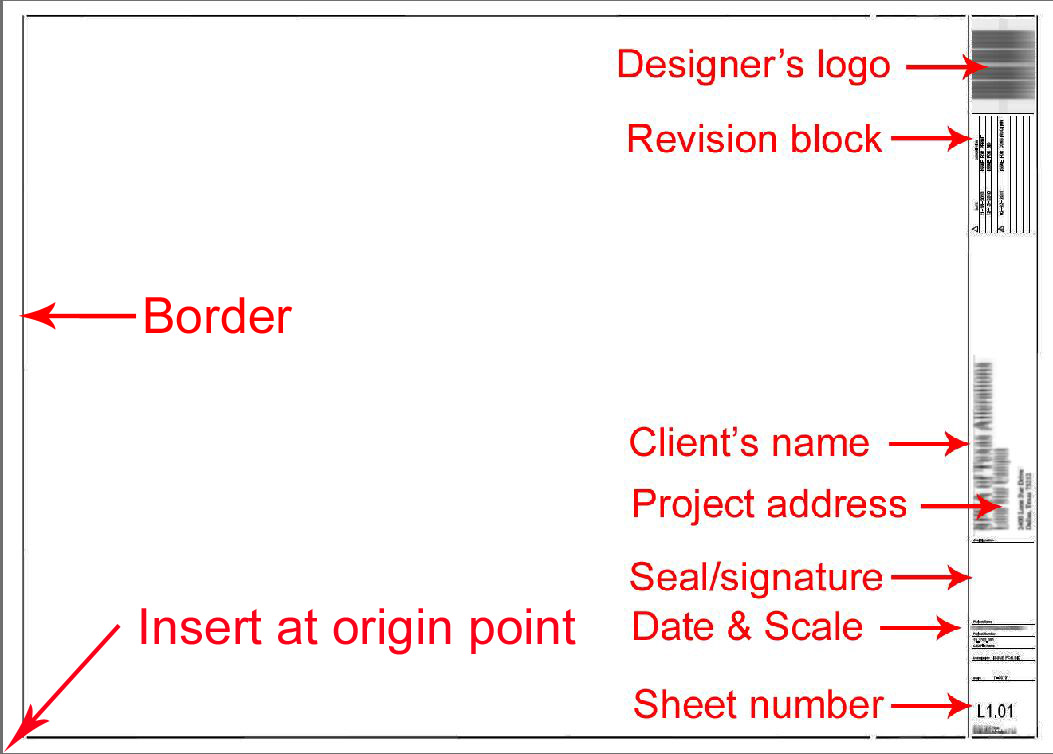
A title block is a compactly-arranged area of the drawing sheet that contains information that is more or less common to all of the sheets for a specific project, such as the project name, designer name, client name, site address, issue date, author, checker, sheet number, scale, etc. It may also include a border that extends along the edge of one or more sides of the sheet.
When we use the term title block in this post, we are referring to both the information table area and the border.
Title block for a government project
CAD CONSIDERATIONS
In CAD, the title block is typically either a CAD block within the sheet file, or an xreffed file. Each of these two options has advantages and disadvantages, which I’ll discuss in a future post.
The title block should not be made of “live” lines and text sitting loose on the sheet. Yes, I have seen title blocks made of “live” lines and text objects within each sheet file, and I know of companies that use this method, but this is not considered best practice.
For most title blocks, a carefully made CAD block (AutoCAD calls this a “block reference”) or an xreffed title block file is the way to go. Blocks and xreffed title blocks have the following advantages:
- consistency in appearance
- consistency of information between sheets
- ease of use
- speedy implementation
SIZE AND LOCATION
The title block information table is typically located in the lower right corner of the sheet. From there it may extend along the right edge to the top right corner, or across the bottom edge to the lower left corner. Or it may only occupy a generally box-shaped area in the lower right corner.

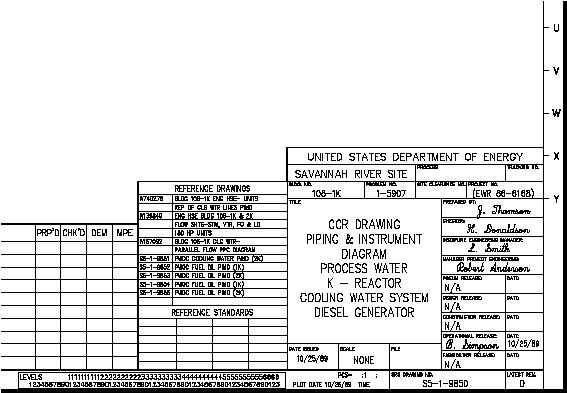
A title block with an attached revision block
It may or may not include a border, as discussed above. The border around all four edges of the page is helpful in making sure that the paper prints (I know, I’m dating myself here) are printed properly. Sheets with no border around all sides are much more likely to be printed and bound out of alignment.
The border line along the left edge of the sheet should be given a wider margin if the binding is to go along the left edge. This “forces” the drawing author to keep the objects out of the “staple zone.”Some borders contain rulers (see the image above) with numbers or letters, to help locate a specific item by its coordinates. This is helpful when discussing a drawing by phone.
The title block should be easy to see and read when you’re quickly rifling through a bound set of prints. It helps the reader of the drawings to quickly locate the right sheet with the right information.
The “information table” part of the title block should be as compact as possible while still being easy to read. It should not take up more “real estate” than is necessary. It should be designed to make the remaining “work area” of the sheet as usable as possible for the type of work shown.
TEXT
The title block text should generally be larger in size. Again, this is important information, and paper sets are often printed at half-size, so it’s good to avoid extremely small text. A good minimum text size is 3/32″ (2.4 mm) high, or better yet 1/8″ (3.2 mm) high.
INSERTING THE TITLE BLOCK IN AUTOCAD
The title block, whether it is set up as a block reference or an xreffed file, should always be placed in paper space at the origin (0,0,0) point.
Why in paper space?
Because paper space is a great tool for letting you see what the print is going to look like before committing to paper. Plus, all sheets are at the same scale (1:1, or full size) in paper space. No scaling is necessary.
Why place the title block at the origin (0,0,0) point?
Because that point is your best hope for a consistent appearance throughout all of the sheets.
TEST
Here’s a test to see how consistent your set of drawings is regarding the layout of sheets. Get Adobe Acrobat (if you don’t have it already), and make a multi-page PDF of a full set of your drawings for a project.
Next, open the bound PDF file and flip quickly between the sheets using the page down and page up keys, or arrow keys, on your keyboard.
Do a lot of the repeating or similar items appear to “jump around” as you move from one sheet to another?
If so, you have some work to do. It’s not as good as it can be.
This is not a trivial exercise. Your client may be flipping through the set in the exact same way soon using free Adobe Reader software, and forming opinions as she looks through your work.
More to come later on this topic. Hope this helps!
Agree? Disagree? Let me know by posting a comment below … and Keep on CADDing! 🙂
Mark
I have been using autocad to design landscape projects and never figured out how to use paper space with viewports etc. I work too hard trying to output my designs. Is there further information regarding setting up the perfect title block?Thank you.